There’s an undeniable allure to hardwood floors—whether it’s their timeless beauty, warm underfoot feel, or their ability to transform any space into a haven of elegance. Hardwood floors have long been revered as a symbol of luxury and sophistication, gracing homes, offices, and spaces of all kinds. If you’re considering hardwood floor installation, this guide is your comprehensive resource. From selecting the right type of wood to preparing your space and understanding the installation process, we delve into every facet of turning your flooring dreams into stunning reality.
- The Beauty of Hardwood Floors: A Timeless Elegance
a. Aesthetic Appeal: Hardwood floors exude a natural beauty that complements any interior design style, from classic to contemporary.
b. Variety of Styles: With a plethora of wood species, finishes, and textures available, you can customize your hardwood floor to match your personal taste and decor.
c. Durability: Properly maintained hardwood floors can last for generations, making them a valuable investment that only grows more charming with time.
- Selecting the Right Hardwood: A Crucial Decision
a. Wood Species: Choose a wood species that suits your aesthetic preferences and functional needs. Options range from oak and maple to cherry and walnut.
b. Grades: Wood is classified into grades based on its appearance. Select from clear grades for a sleek, uniform look, or rustic grades for a more character-rich style.
c. Hardness: Different wood species have varying degrees of hardness. Consider the wear and tear your floors will endure when choosing a species.
d. Color and Finish: Opt for a stain color that enhances the natural beauty of the wood and complements your decor. Choose from finishes like matte, satin, or glossy.
- Preparation: The Foundation of a Successful Installation
a. Subfloor Inspection: Ensure that your subfloor is dry, level, and free from any debris. Address any issues before installation begins.
b. Acclimation: Allow the hardwood planks to acclimate to the room’s temperature and humidity for a period specified by the manufacturer.
c. Moisture Barrier: Lay down a moisture barrier to prevent moisture from affecting the hardwood. This is especially important for installations on concrete subfloors.
d. Sanding and Leveling: If the subfloor requires leveling, sanding, or any repairs, address these issues before proceeding with installation.
- Hardwood Floor Installation: Precision and Craftsmanship
a. Nailing Method: Commonly used for solid hardwood, this method involves nailing the planks to the subfloor at a specific angle using a nailer.
b. Glue-Down Method: Ideal for engineered hardwood, this method involves adhering the planks to the subfloor using a specialized adhesive.
c. Floating Method: Suitable for engineered hardwood, this method involves attaching the planks to each other rather than the subfloor. It’s often used for installations over concrete.
d. Interlocking Systems: Some engineered hardwood floors feature interlocking systems that snap the planks together, simplifying installation.
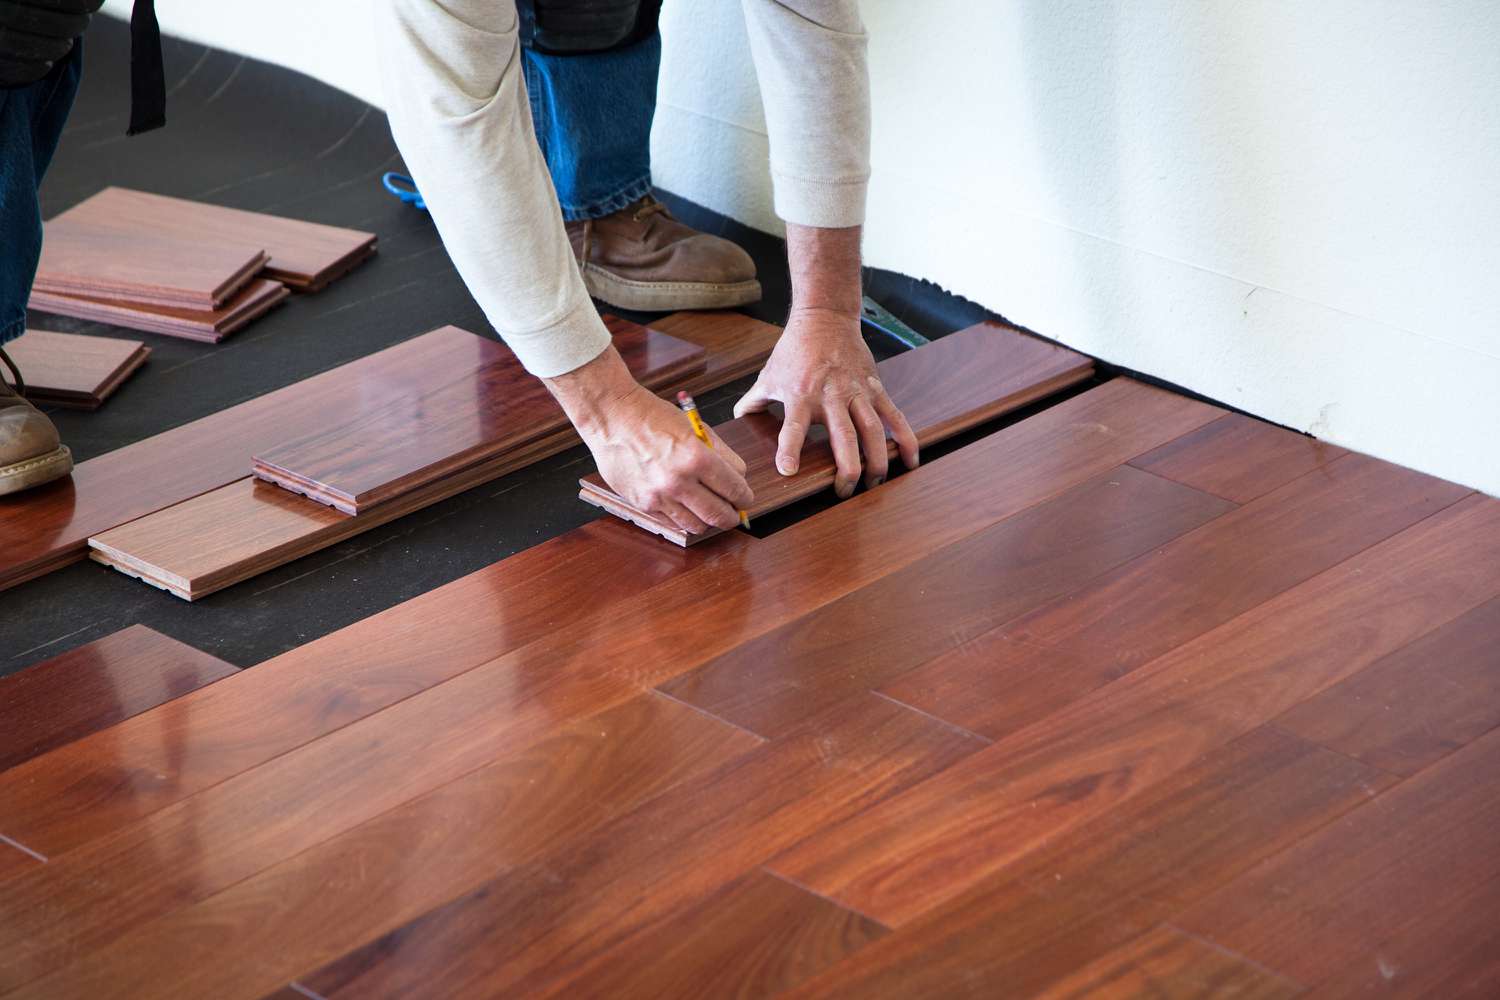
- Expertise in Action: The Installation Process
a. Starter Row: Begin installation along the longest exterior wall of the room. This serves as the reference point for the rest of the flooring.
b. Spacing: Leave a small gap (expansion gap) along the edges of the room to allow for natural expansion and contraction of the wood.
c. Laying the Planks: Lay each plank according to the manufacturer’s instructions, ensuring they fit snugly and securely.
d. Tapping and Fastening: Use a tapping block and mallet to ensure planks are tightly joined, and use appropriate fasteners as per your chosen installation method.
- Finishing Touches: Adding Elegance and Protection
a. Baseboards and Trim: Install baseboards and trim to cover the expansion gap and create a polished look.
b. Sanding and Refinishing: If necessary, sand the floor’s surface to even out any imperfections and apply a finish that protects the wood and enhances its beauty.
c. Maintaining Your Investment: Follow manufacturer guidelines for cleaning and maintenance to keep your hardwood floors looking exquisite for years to come.
- Common Challenges and Tips for Overcoming Them
a. Cupping and Crowning: These issues can arise due to moisture imbalances. Proper acclimation and humidity control are essential.
b. Gapping: Gaps between planks can occur due to changes in humidity. Maintain consistent humidity levels to minimize this issue.
c. Scratches and Dents: Use furniture pads, rugs, and regular maintenance to prevent scratches and dents from damaging your hardwood floors.
- Choosing the Right Professionals
a. Certified Installers: Work with certified and experienced professionals who specialize in hardwood floor installation.
b. References and Portfolio: Check references, read reviews, and ask to see a portfolio of completed projects to gauge the installer’s expertise.
- The Legacy of Hardwood Floors: A Timeless Investment
a. Home Value: Hardwood floors can significantly increase the resale value of your property, making them a wise long-term investment.
b. Enduring Appeal: The charm and elegance of hardwood floors never go out of style, ensuring that your home remains timeless for generations to come.
c. Sustainability: Many hardwood flooring options are sustainable and eco-friendly, further enhancing their appeal in today’s environmentally conscious world.
Conclusion
Hardwood floor installation is an art that blends beauty, craftsmanship, and functionality. As you embark on this journey, remember that each plank tells a story, enriching your space with character and elegance. By selecting the right hardwood, preparing your space meticulously, and enlisting skilled professionals, you’ll transform your home into a haven of enduring allure. Embrace the journey and savor the beauty of your hardwood floors—a legacy that will grace your home for years to come.
3 thoughts on “A Comprehensive Guide to Hardwood Floor Installation”